Friday, January 11, 2013

Wonky Star King Quilt

For years, I slept with a made in China quilt I had bought in 1997 at a super discount store - think cheaper than Walmart.  I loved it.  It was the PERFECT light weight and I looked and looked and LOOKED for a replacement for it.

In July 2011, I found myself in NYC at a delightful sewing shop in SOHO.  One of my regularly creeped bloggers Ashley of Film in the Fridge had posted MANY times about her love of Liberty of London fabric.


I found myself buying a very small bundle of fat 16ths of some REALLY pretty Liberty of London fabric.  It was INSANELY expensive (Shhhh don't tell my hubby he would FLIP).  Not everyone was as happy about my purchase as I was.


I knew I wanted a new quilt, and I knew I wanted it to be Liberty of London, but how the heck do you turn a very small stash of very pretty fabric into a KING sized quilt.

I pondered that thought for a year!

I finally stumbled on Silly Boo Dilly's Wonky Star tutorial and got the guts up to cut into my precious Liberty fabric.  It a pretty easy pattern because its meant to be wrong.  I am lousy at measuring so its perfect for me.

I made this


then a few more....


I knew I was on to something but I had to use a LOT of white to make up for my teensy bit of Liberty. I used a white king sized flat sheet for the white.  I put it on the bed and placed out the stars and figured out where I wanted them, and tore the sheet up into blocks.  You can see the lines in this pic of how I assembled the white parts.  I just made it up as I went along.


I tell you, all the quilt bloggers I creep and drool over are all FANTASTIC photographers.  They have my utmost respect.  Photographing a big quilt is HARD, especially when its HUGE.  I think you can get the just of my design from this one.  A whole lot of white with a smattering of Liberty!

Had to lie this beast out on my garage floor to baste it.  Its BIG.  I'm sure my neighbours thought I was crazy crawling around on the garage floor.

I backed it with a king sheet from the Shabby Chic line from Target.


and edged it with this


Once I had it all quilted and put together, I decided it needed something.  I ended up hand stitching around every one of the stars with different coloured embroidery floss.


And more stitching....


And done!


I was worried about quilting it.   Its straight line quilting.  I  eyeballed it and managed to feed it all through the machine!  Yeah! I can't believe I managed to quilt a KING sized quilt on my home sewing machine!

I have made many quilts in my day, but this is the FIRST that is for ME!  I can't tell you how much I love it.  It is the perfect weight.  I used a bamboo batting and its SO soft and comfy.

I bought myself some super cute sheets at Target last week that look perfect with it.  I can't tell you how trilled I am with it!  It feels really great to do something special for myself!


I think it looks great with our $200 Ikea bed.  

Cost Breakdown: 

All told, I think it cost me around $150 to make.  The Liberty was around $60 - I have blocked it out honestly!  I used a king white sheet for the front, and a king sheet pink floral for the backing.  The edging is a black Michael Miller print with grey dots.  I raided my daughters stash of emboridery floss for the stitching.


Tuesday, January 8, 2013

Loft Love

I have a secret.  OK its not really a secret but spilling a secret just sounds so much more juicy.

I have always wanted to live in an industrial space.  I used to dream about renovating my elementary school into apartments when I was bored in school and letting my mind wander.

Years ago, I actually bought such a space.  Life was crazy and we ended up backing out of the deal.  Its probably a good thing because we ended up having another baby and the loft space most certainly didn't have room for three kids.

I did end up working in a building that was 100 years old and had been a stable in a former life.  It sounds way cooler than it really was.  There were mice eveywhere and it had been stripped of all its pre-war charms with the exception of some of the furniture.

Industrial inspiration can happen even in a bluilder house.  Or so I am telling myself.


I would love a laundry room door like this  - it speaks volumes about how I feel about laundry.


or a kitchen pantry like this. Yup just about describes my cooking talents.


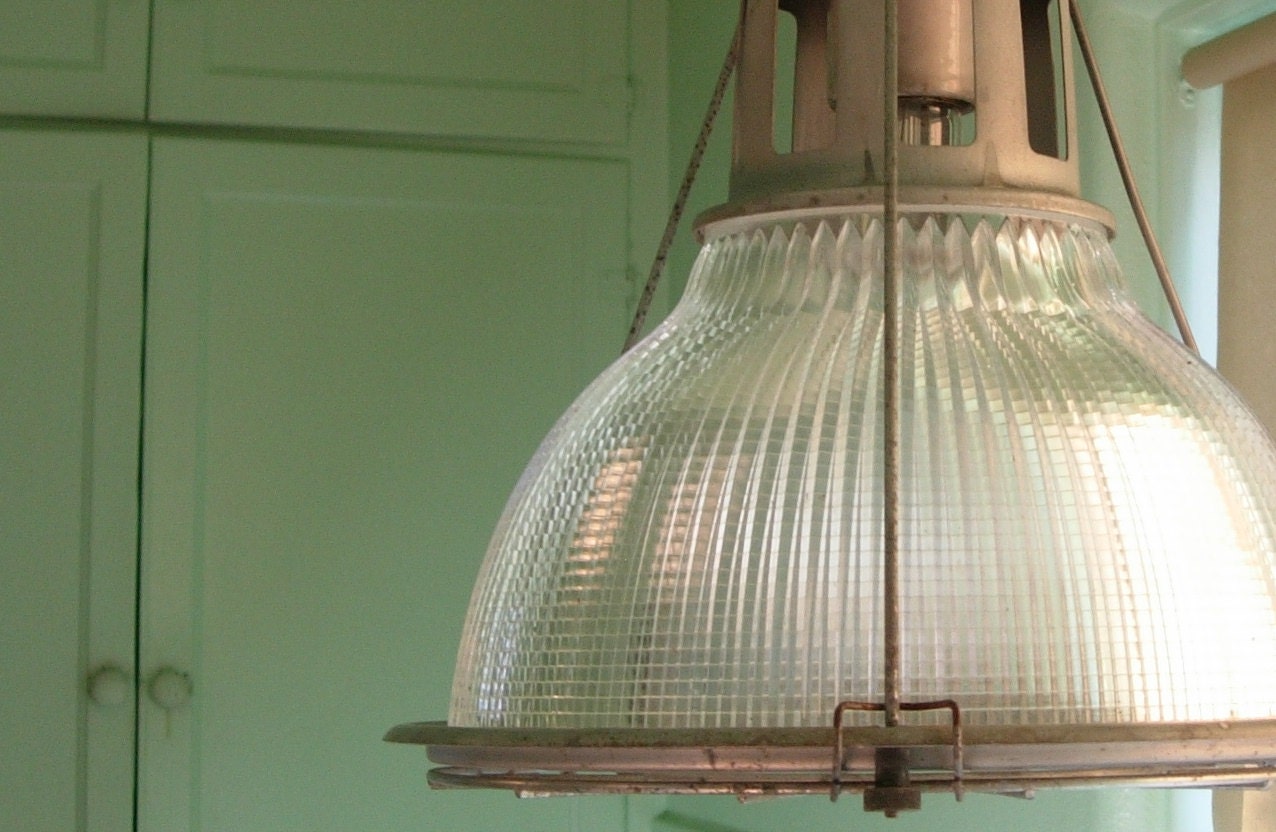
My island is yelling at me for some industrial inspired lighting and my eyes could really use the extra light.  We've been living with poor lighting in here for way too long.   


or these sweet square babies


or this


If youh have any fave industrial loft like spaces you love, I'd love for you to share!

Tuesday, January 1, 2013

DIY Ikea Front Hall Organizer

With five people living in this house, coats and shoes are my nemesis.  Our house has ONE hall closet in the middle of the house.  It doesn't have a front closet nor a back closet.  In winter, coast hats shoes boots are a constant issue.  For the front hall, we desperately needed a storage system so gear didn't end up on a heap in the middle of the floor.

Beside the front door, we have this odd partial wall with a pillar at the end. Its just big enough to be in the way but not big enough to create any sort of visual separation between the entry and the living room.  I thought about tearing it out but it was too much work.

On to plan B.  I measured and realized I could buy an Ikea Expedite book case and plop it onto the ledge and secure it on the bottom with some brackets.  Boom.  Instant wall with lots of storage.


The hardest part of this project was dead lifting it up into the fairly tight space.

We were very lucky with this project that it fit in to our spot almost prefect.  It left us just enough room to get at the light switches by the door.


These handy dandy little brackets came with the shelf.  All we had to do was screw it down.


They even came was some covers to to hide the clips.


Not only did the bookshelf organize my front entry quite nicely, it also gives a little definition to the room.  When someone knocks on my door your not looking directly into my living room which is nice.


And even better, when your sitting in the living room, your not staring at at this big ugly pile of coats hanging on the wall.


Monday, December 31, 2012

My Top 8 Favorite Craft and Decorating Blogs of 2012

The first time I heard the word "blog" was in 1999.  Our computer savvy friend who does start up financing told me that blogging was the future of the Internet and that I ought to be blogging.

Shakes head, I should have listened.

Since then, there are a number of blogs that I have come to faithfully read.  Truth be told, its all about the pictures for me.  I love the eye candy. The following blogs caught my eye in 201 and served to inspire me.  I hope they do the same for you!

One of the first blogs I started reading faithfully is Ashley's Film in the Fridge quilt blog.  Man oh man, she has the eye candy down pat.  I keep coming back for more of her drool worthy quilts time and time again.  Is this gorgeous or is this gorgeous?


From the delicious quilts to the fabric designer, I give you Anna Maria Horner and her fabulous self titled Anna Maria Horner blog.   I'm obsessed with her luscious fabric and her gorgeous blog.  Just look at her sewing space.  I think almost anyone could be creative in that sort of space.


Can you tell where I am going with this?  Yup I'm really into making things or at least dreaming about making things.  My next choice fits right in with this theme.  Ana White is a super talented blogger that starting making furniture out of 2.4's.  Sounds like some bad nightmare from the 1970's and board and brick book shelves but no her stuff is drop dead gorgeous.  Her self titled blog AnaWhite is jam packed with inspiration. This Farmhouse bed is one of her very fist creations.


I think one of the most clever things I saw this year was Censationalgirl's Laundry Drying rack.  Who would have ever thought anything to do with laundry could be beautiful?  Who needs a dryer if you have a hanging rack like this in your laundry room?


Tracie's from Cleverlyinspired"s $10 wood counter also got my attention.  How could you make a counter for just $10 let alone make it something that you'd actually WANT in your house? Yup it sure is pretty and most definitely doesn't look like a $10 DIY special.


Naptime Decorator ALMOST made me want a yellow toilet.  She did a quick paint job and made the most of her 60's yellow toilet.  I never thought I'd use gorgeous in describing a yellow toilet.  But this, is a gorgeous bathroom.


The next blog that really spoke to me this year is Alex and Wendy's Old Town Home.  Having lived in a 100 year old home, their tales of woe in fixing up their house ring so very true to me.  While I loved my old house, I didn't love the crazy electrical or the half demolished back porch we "put up with".  My hat is off to them and the fantastic job they have done with their 100+ year old house.  Those stairs just make me swoon.


Anyone who knows me, knows I have a thing for mid century modern, especially mid century modern houses.  Jessie from Cape27 did a stunning remodel on just such a house.  A little Ikea and a lot of DIY creative talent and viola, gorgeous modern kitchen.  Its just yummy!


So there you have it; the bloggers and blogs that inspired me in 2012.  Do you have any great blogs that you follow that inspired you?  If you do, please share, I'm all about finding fresh eye candy!

Have a happy and safe new year!  I am looking forward to a creative and inspiring 2013~


Sunday, December 30, 2012

Hood Fan and Kitchen Sinks

My kitchen sink is dinky.  There is no other way to describe it.  Its always full but its also hard to wash anything big in it.  I didn't realize just how small it is until I started looking at sinks. I whipped out my trust tape measure the other day and measured it.


Its 7" deep.  I was shocked because a lot of the sinks I had looked at were 9" and 10" deep. 

I have my eye on a rectangular sink - in fancy designer speak, that would be zero radius. I kind of like the sleek design but I'm not 100% sold on its functionality.  If you have one, please comment and let me know if you like it or not.  

I'm also looking at hood fans.  Its a bit embarrassing to admit, but the one we have is a hand-me-down from out next door neighbour.  The one the builder put in our house was so bad, snow would blow in when it was windy outside.  I mentioned it to my neighbour and she gave us her "old" one when she put in a microwave hood fan.  


Yup its the kitchen of many colors right now.  The black hood fan never really went with what the kitchen.  It was meant as a temporary fix.  It is very quiet and it keeps out the snow and wind quite nicely thank you very much.  

My current plan is to take the cabinet that the hood fan is attached to down completely and replace it with a pretty fan.  Like this ....
Or this...

What ever we choose, it has to be mounted at the proper height so I don't bump my head on it like I do with the one that we currently have.  I have to lean under it to reach the back burners.  When I stand back up...boof.  I kid you not, he other day I smacked the back of my head three times.  What do you think?  Do I deserve a new hood fan? 

Saturday, December 29, 2012

To Paint or Not To Paint...


painting oak kitchen cabinetsPainting wood.  The thought scares the pants off of some people. I had this discussion with a friend yesterday who is of the camp that you never paint wood.  I think she she thinks I've committed a crime by painting my oak cabinets.

I realized it was maybe time to take a step back and explain my though process on painting these babies.  My kitchen cabinets are not fine pieces of custom mill work.  They are builder grade.  They have solid wood around the edges but the center panel is particle board with a veneer over top.  They are not something that can with stand a whole lot of sanding.  They also have was appears to be a single coat of finish on them.  The doors flanking the stove and the one over my electric kettle have essentially had the finish steamed right off of them.  They are rough.  One even had the veneer starting to lift.

ugly old oak kitchen cabinet doors Ikea EKBY JÄRPEN BJÄRNUM
Ikea Ekby Jarpen Bjarnum shelf.

All the outer exposed sides of the boxes are nothing more than industrial mac tac which is a polite way of saying they are plastic.When the kitchen was original put together, the sides matched the doors.  Eleven years later, not so much.  The doors have aged and the plastic sides remained the same.  See...even the plastic bit looks super fake.

I had toyed with painting this kitchen for years.  The one thing that stopped me was those plastic sides.  I wasn't sure how successful I would be at getting paint to stick to them.  The insl-s stix primer my paint guy put me on to rocks.  It is STUCK.


I have seen many lousy paint jobs on various kitchens.  The more I googled though, the more I saw just how FANTASTIC some of the formerly ugly oak kitchens looked.  The number one painting crime that is committed by home owners it using white paint out of the can.  One of the things about successfully painting with white, is to get a tinted white.  It adds depth and richness to the colour.

This fantastic kitchen by Chris was a builder blech kitchen.  She pimped it up with moulding and paint to give it a whole lot of custom kitchen bling.


Capree's builder kitchen is also testament to just how much you can change a cheap oak kitchen.


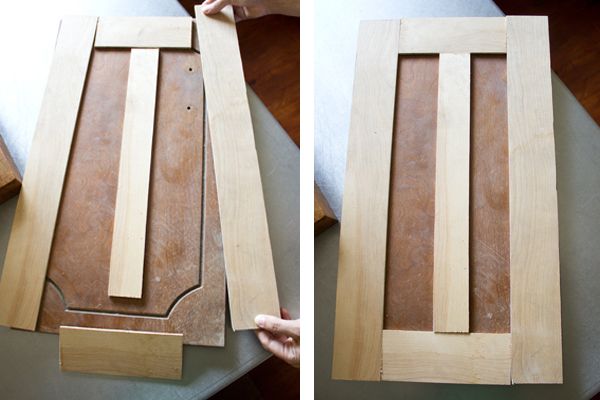
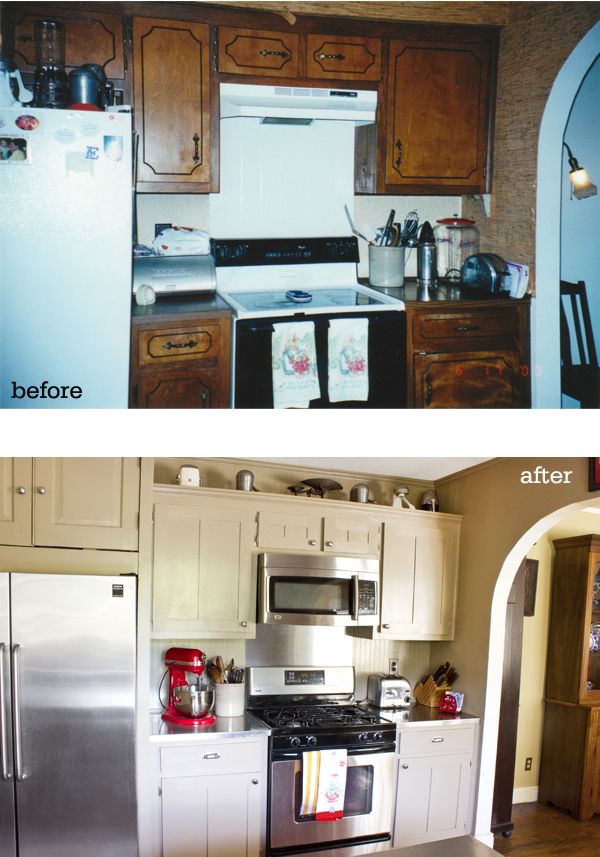
The most exciting thing though, is your not limited to "good' builder cabinets either.  You can even overcome 1970's builder kitchens with some paint and creativity.  My in-laws have this kitchen.  Its really dark and depressing.  Its nothing more than a hunk of particle board with a plastic veneer over it and a design routered into it.  Just look what The Lettered Cottage did with this dated kitchen.


I guess lastly, the thing that finally pushed me over the edge was that I really LOVED my white kitchen in my old house.  It was always bright and fresh looking.  I never, ever walked into that kitchen feeling like I was walking into a cave like I did in this kitchen.

The wood vs white debate will rage on but for me, paint is the way to go.  I like white kitchens.  I would never, ever pick wood for cabinets if I had the choice between the two.  In my world, wood is for furniture and for floors.

Have you painted your kitchen cupboards?  I'd love to see before and after shots!


Friday, December 28, 2012

My Favorite Glue

First off, I need to say that I am not being paid for this.


A couple of years ago, I forget exactly what it was, but something broke.  I went to the store to grab some glue and some random sales clerk changed my life and suggested Gorilla Glue.  Cute name but really?

I have not had much luck with glue in the past.  I've bought many different glues and they have left me with not much more than a sticky mess.

Gorilla glue.  I love you.  I have yet to find something I can't fix with this stuff.  Its quite simply AMAZING.

I fixed the broken handle on my mother's teapot.


You can see the fix but I really don't care.  It has sentimental value.  It was pretty dusty after I glued the handle back on so I threw it through the dishwasher!  The handle held and is SUPER strong.


I used the wood glue to glue the shelf back into my china cabinet.   Yup its dusty in there!  Yikes.


We bought this larimar ring for DD a couple of years ago in the Caribbean.  She wore it faithfully until one of the stones along with the setting broke off.  She has kept it for over a year.  She pulled it out the other day and handed it to me and said "can you gorilla glue this?".  Sure why not try!  

I tell you, I tried and I failed.  It was really hard to hold the stone without gluing it to my fingers to the ring and together.  I sat and pondered it and then gave it another go.  It WORKED.  I should have taken a before shot!


A little self hand modeling....  I have no idea how long this will hold for but it feels pretty secure.