When it comes time to choose a kitchen counter, there are lots of options out there to consider. Should you do wood, laminate, stone, concrete....its enough to make a girl bang her head aganist - the counter.
LAMINATE
Chances are, if you bought a builder house like I did, you have laminate counters. Laminate is a realatively cheap alternative and comes in a variet of different finishes. It scratches and has a limited life in a busy kitchen.
Laminate has been around for a long time. The 1963 bungalow I grew up in had "gold nugget" in the kicthen. My current kitchen had "colorado slate" Formica.
I considered replacing my counters with new laminate. The quote for new Formica FX laminate came in at a whopping $1500 just for my island because the island is a custom funky size.
WOOD BUTCHER BLOCK
One of the lowest priced counter top options, is butcher block from Ikea. The sizes are limited but if your lucky, and the size matches, your counters could be as little as a few hundered dollars.
One of the most popular Ikea optons is the Numerar wood butcher block counter.
Numerar can be stained and trimmed to fit. My friend successfully stained them dark in her kitchen and they look great!
Ikea was out because my island is 83" and their island piece they sell is only 80". I didn't want a seam down my island. Ikea butcher block is the low end of wood counters. There are some incredibly beautiful wood counters made from exotic woods that were not even a consideration for us. But oh they are beautiful.
Cost wise they were out of the budget. I decided that I could not deal with the manintenace of wood because we are just too messy.
CONCRETE
For years, I had a fantasy that I wanted concrete counters. I love the dark grey color and the idea that its hard but not quite stone. I even went as far as getting a book about how to DIY concrete coutners. After a lot of research, I realized that it was beyond my super handy DIY skills.
For those of you intersted in DIYing concrete counters, Splatgirl has excellent
instructions. Her counters are so pretty but the process is not for the faint of heart. Its a lot of work and they are heavy.
STAINLESS STEEL
Another option I considered was stainess steel. I love the look of stainless counters and that you can mould a sink right into your counter seamlessly. It was one of the most expensive options I considered. My island, wihch measrues 83" by 36", was going to be over $3,000. I didn't even get a quote for the rest of the counters! I knew stainless wasn't an entirely practicle choice because it scratches easily and with three kids it would look awful in no time flat.
MARBLE
What can I say. I am a marble girl. I love LOVE love marble. I did a lot of research and soul seraching and came to the conclusion that I could not do marble in my kitchen. The quotes I had for marble ran between $6,000 and $9,000. Marble is porrus and will stain. My neighbour has gorgeous calacatta marble and red wine stains and all.
Isn't that just the prettiest counter EVER? This is what mine would have looked like. Marble stains look like this.
GRANITE
Grainte is a go to stone for kitchen counters. Its durable and can take day to day wear that marble can't. When we first moved into this house 11 years ago, I got a quote to redo the counters in Kashmir White Granite. I never did put in granite and lived with yucky laminate for years. The quotes I had for granite ran from $4000 to $6000 to do the whole kitchen.
SOAP STONE
Soapstone is the anti-marble. Its black with white veins. I briefly considered soapstone. Its suppose to be pretty durable and relatively carefree. I couldn't get over the science lab look though. I spent way too many hours sitting behind soapstone counters when I was in school which pretty much killed the thought of bringing it into my house.
SOLID SURFACE ACRYLIC
Acrylic counters are sold under many different name brands, the most popular being Corian. I really like some of the newer corian designs but I coudln't get past the idea that it scratches easily and can burn and melt if your not careful. The colors and texture have improved a lot over the years. The uside of solid surface is that sinks can be molded in with no seams. Scratches don't penetrate the color because the color goes all the way through. This is really pretty and natural looking.
Corian of yesteryear.
QUARTZ
Quartz is a bit of a misnomer. Quartz isn't acutlaly quartz but a man made "stone" material. Its the hardest man made material currently manufactured. Its very durable and is easier to live with than pretty much any other material because it is super low maintenace and doesn't require resealing like granite and marble.
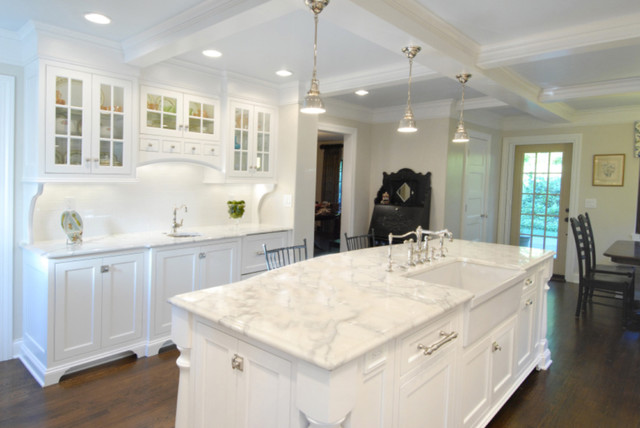
Quartz ended up being our winner. We had quotes from $3500 to $6000 for quartz. I really wanted white counters and I knew that qartz would be the easiest to live with. I had quite laminate counters in my old house and I knew how easily they stained.
Hopefully this tutoiral helps you make your counter decision a little easier. There are a lot of great options out there!