Wednesday, January 30, 2013

DIY Using Trim to Hide An Ugly Soffitt or Bulkhead

Many, many kitchens are like mine and were built with an ugly soffitt or bulkhead over the cabinets.  Yuck.


The problem with a soffitt is, when your cabinets are a different height than your ceiling, your eye rests on the line, visually lowering your ceiling.  In my case, my cabinets are hung at 8' and my ceiling is 9'.

I dreamt for years of ripping out the soffitt and putting in cabinetry.  The reality is, my ceilings are 9' high and I already use a stool to access the top two shelves.  I realized that the solution I needed was not to rip out the soffitt but to decorate it.

I spent a lot of time looking for inspiration for pimping up my soffitt.

Amy's Casablanca blog is case in point for pimping up your soffitt.


A lot of really high end custom kitchens, have fabulous trim above the cabinets.  I knew I could rig something to make mine look like they were part of the mill work vs a cheap builder space filler.

Shannon did something similar on her kitchen.  She didn't have soffitts but she added height to her short cabinets to give them added visual bling.


Just look at these with some height!  Her cabinets went from looking like they came from a home store to being custom.  She used some simple mdf boxes and a bit of trim.


I used some poplar trim that I stuck up to see how it would look.


I can't believe how much higher my ceiling looks with the soffitt trimmed.  It really is an easy DIY transformation.  I posted about it here if your looking for the juicy details.  The crown molding is plastic from the home store but it looks great with the trim.


Tuesday, January 29, 2013

Easy DIY Up-cycled Kitchen Storage Jars


A friend posts this very interesting blog about lunch in a jar by Krista and Jess.  They take a mason jar and fill it with interesting lunch foods.  Microwaving glass is so much less scary nuking plastic.  Check out this food porn.


Over the years, I've washed out several "mason" jars from spaghetti sauce.  The jars are awsome pressed glass but the lids leave a lot to be desired.


It hit me the other day that all I needed to do was give the lids a quick spray paint. I cleared the snow of the bbq to do this!


It snowed right after I spary painted these.  I took some really cute shots of them in the snow....without the card in my camera.  Ho hum.


And viola!  Cheap and cheerful and SUPER easy. My daughter has already claimed the purple one.


Monday, January 28, 2013

And...and... and

If' you have been reading my reno in real time, you know just how long its taken me.  Its been quite the process.  I am always amazed at all the DIY superwoman bloggers out there that post about thinking about a kitchen redo and boom their kitchens go from horrid to fabulous in the blink of an eye. Its hard to get a grasp of time frame in blog land.  I have been slogging away with this for months. Its a slow process.


Painting cabinets, while pretty "easy" is a really time consuming process.  There is a lot of waiting around for them to dry.  If your me, there is the waiting around for winter to end.  I have painted almost my entire kitchen but there are four doors that still need to be done and I'm stuck.  I don't have a place large enough in my house to lie them horizontally and let them dry for a few days and it has been below freezing out side for weeks.  I painted most of the doors in the garage but it is unheated so its not an option until it gets warmer out.

Alas we have been living with he doors like this for far too long. I need to figure out where I can paint even it it means doing one door at a time.

Yup a bing bang boom get it done at lightening speed super blogger I am not.  Yup my huband leaves his dirty socks on the floor, my dog snores, my kids fight and my house is more disaster than DIY superstar.  I do hope that my prattling on gives you an idea of what it takes real time to complete a job like I have undertaken.

Some days....


In the mean time, I think I have decided to order this faucet and see what it looks like.  It can be installed as a single hole without the plate thing.


Sunday, January 27, 2013

Splash Back

One of the only things that I ever liked in this kitchen was the back splash.  I put it in on new years even in 2005.  Its just a plain white subway tile but I love it.  Its plain, simple and classic.


Our current Formica counter has a raised back splash lip on the back.  In a word, YUCK.  The new counters will be straight with no splash back.  It left me with the conundrum of what to do with the 3.5" or so of wall where the new counter will being and the back splash begins.

I knew I wanted to put another row of tile but I have been fretting about buying new tiles to "match" the old ones.  I had bought them at Home Depot (by no means an add) and knew they still carried similar ones but I was a big worried matching whites after 7 years.


(The crappy old counter doesn't look half bad in that pic!)

Apparently I'm more organized than I give myself credit for!  I was digging through our crawl space today looking for something my older son had been looking for.  I turned around and much to my sheer and utter delight I saw a Datile box.  As soon as I saw it I knew it was left overs tile from the back splash!


My poor dog is not quite sure what is happening around here.  Her doggie bed is getting moved around the kitchen on a regular basis.  Woof.


Saturday, January 26, 2013

Counter Measure

The counter fabricator came to measure the other day.  She was very helpful and made a couple of suggestions.  As you know, I've been debating what to do about the faucet.  The one we have is a pretty good American Standard one.  Its older and needs three holes drilled into the new counter;  one for the spout, one for the on off lever and one for the sprayer.  Newer better quality faucets are almost all single hole.  I'm not completely convinced I like the single hole design but I can see the merits of having only a single thing to clean around.


The fabricator suggested that if I hadn't completely decided what to do that the best idea would be to drill two holes in the counter.  I could reinstall my current faucet but without the spray hose.  In the future, I could later install a single hole faucet and then put in a soap dispenser.

Just like this set up


I have been thinking  that might be a really good compromise.  The more I thought on it though, the more I think its a really good idea.  She tells me that the soap dispenser can be filled from above which was part of my hesitation.  I had been thinking that it was meant for hand soap.  Silly me.  I just realized that you could fill it with dish soap and not have a bottle to deal with.


I did go out shopping for faucets the other day and I fell in love with a gorgeous vintagey one.  It was $1800 which is so not going to happen.

We have had to switch out install date around too.  Ho hum.  The big day is now scheduled for Valentines day!   I can't tell you how much I am looking forward to having an under mount sink.  No more goo around the counter rim.  Yeah!

I'm also really looking forward to my kids being able to sit at a proper island to eat.  The breakfast bar we currently have is stupidly high and too narrow to eat at.


I have a confession to make.  Ten, yes ten, years ago when we bought this house, I bought counter stools to go at our island.  I have wanted to get rid of the breakfast bar since the get go. Things always go slower than you think and we have lived with stools that are too short for  ten years.


Wednesday, January 23, 2013

Counter and Cook Top

We decided to go with the quartz.  Yeah!

We also decided to keep the cook top oven combo for now.  Our current cook top is a Whirlpool and after extensive googling, I found that the cut in the counter is the same dimension for all of their 30" products.  We do limit yourself to products that fit a 20.5" by 29.5" hole but there seem to be a lot of cooktops that will fit into that cut out.

They are coming to measure TODAY.  Gulp.

I have some decisions to make before the counter arrives the main one being what to do about the faucet.  

Our faucet has a long illustrious history with us.  I bought it for my kitchen in my last house. I wanted a single lever goose neck faucet which was almost impossible to find in 1997.

It looked perfect in my old house.  I liked it so much that when we decided to sell the house, I replaced it and brought it with me.  I still really like it.  Its great for filling large pots.

I am a bit concerned abut drilling three holes into he new counter for a 15 year old faucet.  I keep asking myself if I'm nuts. I'm not a fan of the pull down faucets that seem so popular these days.  I have seen too many that are broken and hang down at odd angles.  

I am hoping to end up with something that has this sort of feel to it.  Light and bright and clean.


Gluten Free Samosas


Gluten Free Samosas

I used to live in Little India. I CRAVED samosas something fierce when I was pregnant with my youngest.  I haven't had them in YEARS and I was craving them badly today. I've been experimenting with Indian food and made bharwan aloo last week. My kids went nutso bananas for that. So today was the day for the samosas. 

The Filling:

3 Potatoes finely diced
1 carrot finely diced
1/2 tsp of garlic powder
1/2 tsp onion powder
1 table spoon of vegetable oil
2 table spoons of curry powder or your own spices according to taste Salt, Pepper to taste.
200ml of chicken or veggie stock.
Heat the oil in a frying pan and add veggies and spices, stir well until coated and beginning to soften. Add the stock, cover and simmer for 30 minutes until cooked.

Pastry
1 1/4 C White Rice Flour
¼ C Sweet Rice Flour
4 tsp xanthan gum
1 tsp gelatin
1 egg
¼-1/2 C milk of choice
1/2 cup of butter or oil
1 tsp honey
Mix together rice flour, sweet rice flour, xanthan gum and gelatin. Make a well in dry ingredients large enough to hold the liquids.

Lightly beat egg with ¼ C milk, butter and honey. Pour this into well in dry ingredients. Mix everything together until you have a soft dough.

Wrap dough in plastic wrap and cool before rolling. When dough is ready to roll, place it between two pieces of heavy plastic. Cut open zip lock bags are perfect for this.
Roll each piece into a ball and roll out into a circle of 15 cm. Divide this circle into two equal pieces with a knife.
Brush each edge with a little water and form a cone shape around your fingers, sealing the dampened edge.
Fill the cases with potato mixture and press the two dampened edges together to seal the top of the cone. Deep fry the samosas in hot oil until crisp and brown take out and drain on a paper towel.

Tuesday, January 22, 2013

Rethinking again...

You must be so sick of me rehashing and rehashing my kitchen.  They come to measure tomorrow.  Squee.

I spent the morning cleaning out the top cupboards not because I needed to for the measure but because they are gross.  I mean, really, who would ever eat 10 year old dried lentils - mice perhaps.

I have been mulling a change in plans for my bottom cupboards.  The original plan was to swap out our original set of drawers and a 11" cabinet with one set of pot drawers.  I LOVE those pot drawers I love them SO much, I now want a second set.

If you have been reading since the beginning, you might remember that the I scored the pot drawer fronts on SUPER as-is from Ikea for $10.  They had been discontinued 6 months before and the profile was a close enough match to egg me on.  They were a dark brown like this...


And I painted them a warm white look like this


The problem is, I can't get more of them.  I can only get Ikea, Lidingo doors which are a white polyester finish and a completely different white.  They are the exact same profile though.

They are shiny with a plastic type finish.  I ran to Ikea this afternoon (in a snow squall no less) HOPING to find a Lidingo door or drawer piece as is and super cheap so I could bring it home and damage it.  I found a small, odd sized door for $5 to experiment with.  Score!

See the WAY different colours and finishes.  My existing painted Liljestad is the big one, the new Lidi is the front one.  Not even close.  Yikes.


I gave it a quick sand with a sanding sponge.


I whipped out the primer and did a couple of test spots.  One is on the sanded side, one is on the unsanded side.  You can see the gap in the middle where its the original shiny finish.


It takes me back to my very first test drawer front I did.  It worked really well.  Hopefully this will too.


Now I wait.  I have to let it cure for a few hours before I decide if its durable enough to be viable.  I really want this to work.  If it works, I am going to replace three bottom cabinets with a proper corner unit and a set of 36"pot drawers.

One of these....
and a set of these....


These two cabinets would replace the three cabinets between our stove and oven.  We currently have a dead corner which is a huge of a black hole which in reality is nothing more than a plastic tub grave yard.  I think being able to access the corner in a meaningful way would go a long way toward improving the functionality of the kitchen.


Saturday, January 19, 2013

The Cook Top Dilemma....

My house was built with a cook top over a wall oven provided by the builder.  It was the only appliance that came with the house.   Its a bit of an odd configuration.  Because the cook top is immediately over the wall oven, it makes the oven quite low to the ground.  This is a really old picture but you get the just.  Because the cook top sits into the counter 3", the oven has to clear that and have room for its controls.  When you cook something big in this oven like a turkey, its like dead lifting off the floor.  The rack in a conventional oven would be a good foot higher and have a storage drawer below the oven.


The cook top and wall oven were higher end models when they were installed in the house in 2001.  The oven bakes quite well but it isn't convection which I would really like to have because my life with three kids is crazy busy and anything where I can pimp out a few extra minutes helps.

I can live with the oven.  I don't love it but its fine.  The cook top on the other hand is my nemesis.  I have never loved it.  Our builder gave us a choice of white or black for the combo and I took white because my fridge was white.  The white oven was exactly as I had expected it to be.  The "white" cook top wasn't.

I three friend lives up the street that were given the black model.  Its all black and all three are in really good condition..  The white one however, has this odd white lip around it and the glass surface is a black and white speckle.  Its not black and its not white.  Its YUCKY.  Making it even more yucky is the white rim around the edge that is some sort of painted surface that has been affected by the heat and has chipped away.  I suspect its from the heat because the worst part is by the big burner.


About a month ago, I actually took a paint scraper to it to see how easy it would be to just scrape off the white paint.  I think the raw metal is better looking than the white.  The bits by the burner were very easy to scrape off, the rest is stuck.  So much for that plan.

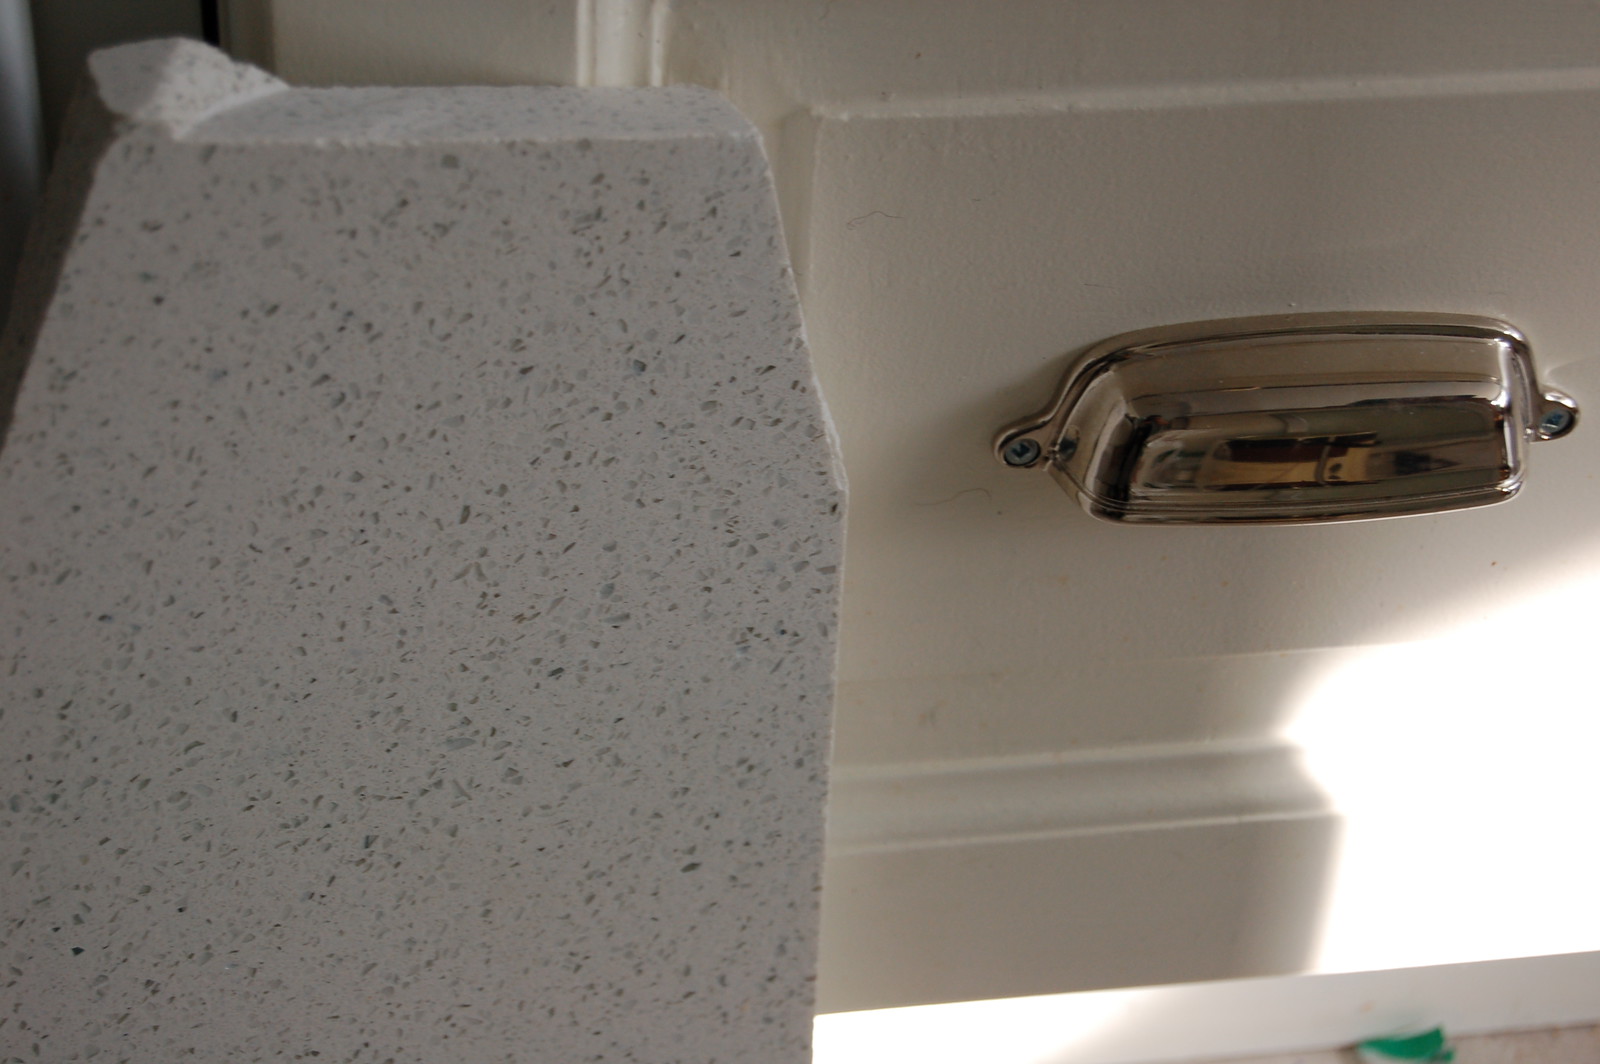
In redoing the counter, I need to either have a hole cut in solid surface for this cook top, replace it, or replace both it and the oven with a slide in range.  I am torn.

I am concerned about putting this baby into a new counter because I am worried that the hole in the new counter might not be the same size as newer model cook tops.  I am concrened about buying a new cook top and leaving the oven because I know as soon as I do that, this oven will roll over and die.

I like the look of this LG range.  My husband Ralphie has insisted that if we replace the current situation with a range, the knobs have to be on the front.  I am not on the take from LG but I would delightfully take a stove from them were they to offer.  :)
The upside of this is I could upgrade to a convection oven.  The down side is the cost.  Slide in ranges are expensive and a lot are really quite homely looking.

I can't wrap my head around the design of this GE slide. To me it looks like a crash landed UFO.  

This Maytag is a bit better design wise. I kind of like the retro shape window.


I think as I look at slide in ranges, I am talking myself into keeping the cook top oven arrangement.  They all seem to have a dreaded lip on them.  The one on the existing cook top drives me apes.  I have also thought about getting an induction cook top but that would involve getting a whole new set of ferris (iron based) pots.

No knobs, no weird lips.  


Friday, January 18, 2013

Kitchen Counters...Part 4734....

And for the 4734 update on the counters.  I think I might have settled on something.  The current choice is...quartz.  Its a Hanstone that has the most SUBTLE bit of blue in it.


I really want something that is white.  I love marble but I know we just can't live with marble.  We are too messy.  PERIOD.  I need something on my counter that can survive spaghetti sauce sitting, festering for a week.  Quartz can with stand that sort of punishment.  

My friend Nicole recommended a stone place she knows from our kids old school.  Off I went yesterday to find the place.  I drove around and drove around and FINALLY found it.    Its a bit of a tease of a place.  You can see it from the highway but its hard to find on the street.

I hauled home three good sized samples of the quartz.  In three variations on the theme. Seeing them live and in person in my kitchen is SO great!


Can you see who is REALLY happy about them?


  I think it looks quite attractive with the white cabinetry and the handles.  It has a tiny bit of sparkle to it which is almost impossible to photograph.  I like that the "bits" in it are smaller that most quartz which gives a more uniform feeling to it.  


I am very juiced about this.  The quartz from the "source" is $4000 cheaper than marble and significantly cheaper than granite and only a few hundred more than laminate.  I was gobsmacked.  It was going to be $1500 to do just the island in the fancy Formica FX.  

The big decision now is what to do about a stove.  We have a cook top and an oven below it.  I don't mind the oven, but I despise the cook top.  I am not sure I want to cut a hole in a brand new counter for our old, damaged cook top or if I want to replace the cook top/oven combo with a stove or just replace the cook top. 


Saturday, January 12, 2013

Gluten Free Chocolate Chip Banana Muffins


My daughter took this picture last night. Our fish Squishy is in the background. I think my little blue dude is wondering what all the fuss is about. He is a very curious fish.

These are sin fully good muffins my cousin makes almost every time I visit her. They are SOOO good and they turn out with fantastic results with gluten free flour. My mother used to make a very  similar gluten filled cake when I was a kid that was SO moist and delicious. Cuz doesn't think its the same recipe because our mother's weren't the type to bake with exotic ingredients like yogurt.  If you have ever made gluten free hockey pucks that are suppose to pass as muffins, you will appreciate these.  They are VERY fluffy and moist.

Gluten Free Chocolate Chip banana Muffins

3/4 cup of mashed ripe bananas (I used 3)
1/2 of granulated sugar
1/4 cup of vegetable oil
1 egg
1 cup of Gluten Free Flour (I used King Arthur)
1 tsp of GF baking powder
1 tsp of baking soda
1/2 cup of plain yogurt
1 tsp vanilla
and LOTS of chocolate chips (3/4 of a regular sized bag is good)

Preheat Oven to 375 degrees. Use muffin papers.

In a large bowl using electric mixer, beat together bananas, sugar, oil, egg and vanilla until well mixed. In another bowl, stir together flour, baking powder and baking soda. Stir flour mixture into banana mixture. Stir in yogurt. Gently fold in chocolate chips.

Pour into muffin pan. Bake for 15 min or until tester comes out clean.

approx 150 calories per muffin - 6 grams of fat